If the Raspberry Pi is a tiny computer, its GPIO pins are how it reaches out into the real world. They let the Pi do something ordinary computers cannot do: sense things, trigger reactions, and physically interact with whatever you connect to them. These pins can switch an LED on, detect when a button is pressed, read the value of a sensor, or control motors and displays. They are what turn the Pi from “just a computer” into the heart of a project.
GPIO stands for General Purpose Input/Output, which sounds complicated but simply means the pins are not tied to one fixed job. You can choose whether each one listens (input) or acts (output). That flexibility is why beginners love the Pi. It invites experimentation. You can start with a single LED, then build up to a weather station, a smart alarm, a robot, or a home-automation setup. Everything begins with those GPIO pins.
Why do GPIO pins sometimes feel limiting?
Once you start building, you quickly notice the Pi has only so many pins. They are enough for learning, but larger projects often need more. A few LEDs, a button or two, a sensor board, and suddenly you are out of space. It is a bit like planning a road trip and realising your car only has two seats. Great for short journeys, but not ideal when your plans grow.
This is where GPIO expansion becomes useful. Instead of ditching the Pi or redesigning your project, you can add a small helper chip that gives you more pins to work with. This is the role GPIO chips play.
How GPIO chips extend what your Pi can do
A GPIO chip does exactly what it sounds like. It adds more GPIO pins to your project. The Raspberry Pi stays in charge, but the chip acts like a friendly assistant with extra hands. You still write code on the Pi to switch things on or read sensors, but now those actions can happen through the extra pins provided by the chip.
The clever part is that you do not need lots of extra wires to control these extra pins. The Pi talks to the chip using a communication method called I²C, which keeps everything neat and simple.
A beginner-friendly look at I²C
Although I²C looks intimidating on paper, it is actually one of the simplest ways for the Pi to communicate. It uses just two wires: one to carry data and one to provide a timing signal so everything stays in sync. Many devices, including sensors, displays and GPIO expanders, can all share these same two wires at the same time.
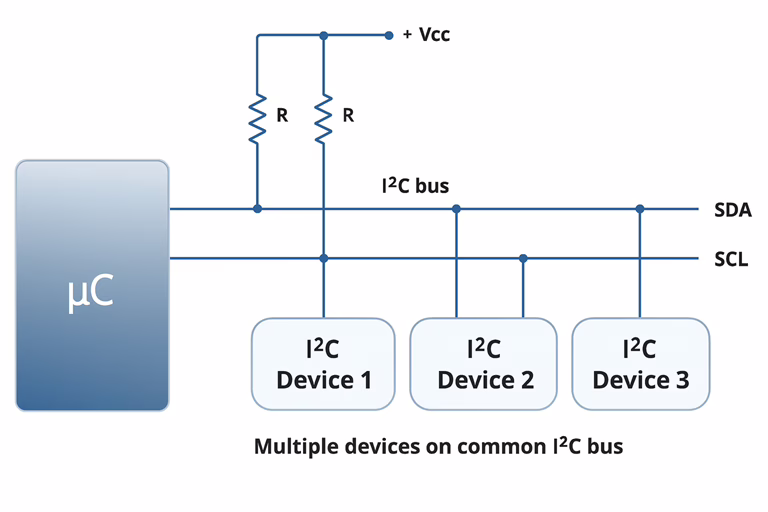
A useful way to picture I²C is to imagine a classroom. The Pi is the teacher and all the connected chips are the students. Everyone listens on the same two wires, but each student has an address. When the Pi calls out an address, only that chip responds. This is why you can plug several devices into the same pair of wires without them talking over each other.
For GPIO expanders, I²C is the channel the Pi uses to send short instructions such as “turn this pin on” or “is that button pressed?” The chip takes care of the details and the Pi gets the result, all through that shared connection.
Common GPIO expanders for Raspberry Pi
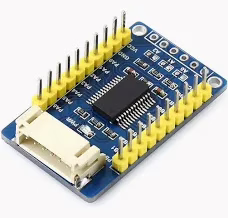
Two popular options appear frequently in Raspberry Pi projects: the MCP23017 and the PCF8574. Both give you extra GPIO pins that work just like the ones on the Pi, although each has its own strengths. The MCP23017 offers more detailed control, which helps if you want features such as built-in pull-ups. The PCF8574 keeps things simple and is often easier to begin with.
Because they both use I²C, they are well supported in Python libraries such as gpiozero and smbus2. This lets you start experimenting with just a few lines of code.
So what can you do with all these pins?
More GPIO opens up bigger ideas. You can build a full control panel with dozens of switches and lights, create a matrix of sensors for a robot, or run a homemade keypad. Instead of hitting a wall because the Pi’s built-in pins are full, a GPIO chip lets you keep building and keep learning.