The MAX98357A is a compact digital Class D amplifier that pairs perfectly with the ESP32-S3. It takes digital audio directly over I2S and drives a speaker without needing a separate DAC.
It is important not to confuse I2S with I2C. I2C is for small configuration data. I2S is a dedicated digital audio protocol. The ESP32-S3 sends audio using three pins:
• BCLK for timing each bit
• LRC to indicate left or right channel
• DIN for the actual audio data
No MCLK is required, which keeps wiring simple.
How the Amplifier Works
The MAX98357A converts incoming digital audio into a 330 kHz PWM signal. The speaker’s coil smooths this high frequency signal into audible sound.
Its outputs are bridge tied, meaning neither speaker terminal connects to ground. Always connect the speaker across the two output pins only.
Power and Output
The amplifier runs from 2.5 V to 5.5 V. Supplying 5 V gives higher output power, up to about 2.5 W into a 4 ohm speaker at low distortion.
If running at 5 V, ensure your power supply can handle around 650 mA.
Gain and SD Pins
The GAIN pin sets amplification level. The default is 9 dB when left floating. You can adjust it between 3 dB and 15 dB by connecting resistors to ground or Vin. A power cycle may be required after changing it.
The SD pin controls shutdown and channel selection. Different voltage levels select stereo mix, left only, right only, or full shutdown.
Together, the ESP32-S3 and MAX98357A form a simple, efficient digital audio solution ideal for robots, classroom builds, and embedded sound projects.
Parts List
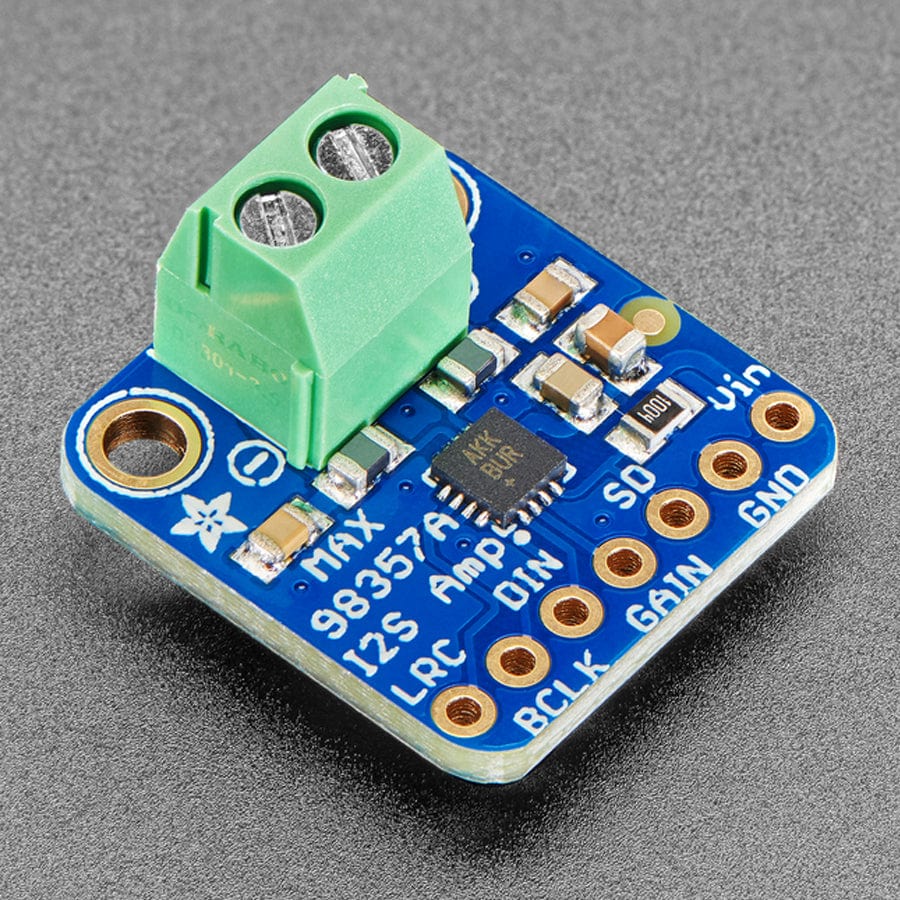
- MAX98357A I2S 3W Digital Auditory Amplifier
- Small Speakers Metal Shell Round Internal Micro Magnet Speaker
- Freenove ESP32-S3 ESP32 S3 Board Lite
- 2 x MMOBIEL 1pcs Solderless PCB Breadboard Prototype Circuit Board
- ELEGOO 120pcs Multicolored Dupont Wire
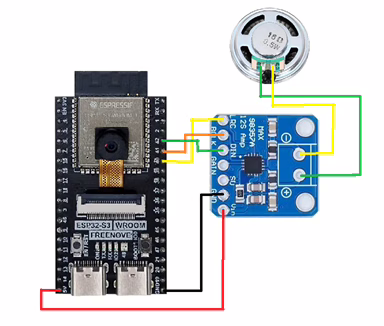
Wire up the circuit
In order to run the project firstly the MAX98357A module needs to be connected as shown in the diagram below. The circuit diagram below is shown for clarity and the actual connection on the breadboard follow.
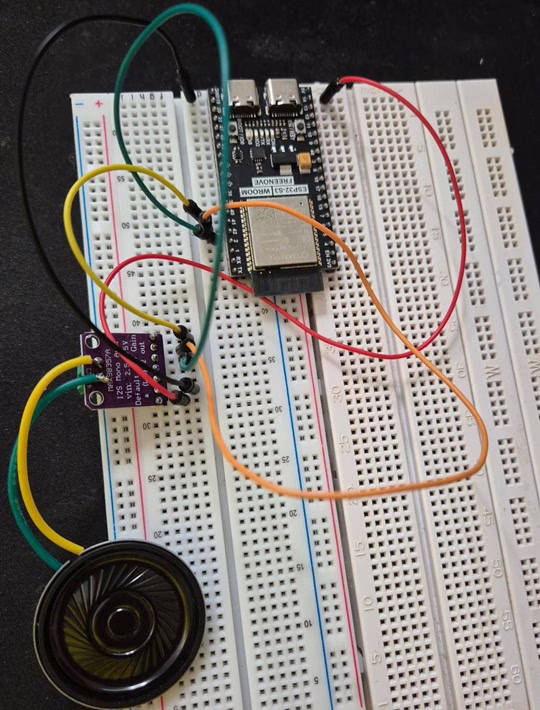
The circuit looks as shown below on the set up that was used to create this tutorial.
Running the Code
In order to get started you will need to follow this tutorial, which will ensure that your environment and ESP32 are configured correctly.
Next, you will need to find a sound to use. There are several free sites available for personal use:
The sound format will need to be in mono channel in WAV format, called sample.wav. You can change the name of the file at the bottom of the following code if required.
Now create a file called main.py on the ESP32-S3 with the following content.
from machine import Pin, I2S
import time

# =========================
# MAX98357 I2S pins (ESP32-S3)
# =========================
PIN_LRCLK = 40   # WS / LRCLK
PIN_BCLK  = 41   # SCK / BCLK
PIN_DATA  = 42   # SD / DIN

# =========================
# WAV helper (very small parser)
# Assumes: PCM, 16-bit, mono/stereo supported
# =========================
def _read_u32_le(f):
    b = f.read(4)
    return b[0] | (b[1] << 8) | (b[2] << 16) | (b[3] << 24)

def _read_u16_le(f):
    b = f.read(2)
    return b[0] | (b[1] << 8)

def _find_chunk(f, chunk_id):
    # WAV is RIFF container with chunks. Scan until we find chunk_id.
    while True:
        cid = f.read(4)
        if len(cid) < 4:
            return None, None
        size = _read_u32_le(f)
        if cid == chunk_id:
            return cid, size
        # skip this chunk (pad to even)
        f.seek(size + (size & 1), 1)

def play_wav(path, volume_scale=1.0):
    """
    Streams a PCM WAV file to MAX98357 via I2S.
    volume_scale: 0.0..1.0 (simple software scaling for 16-bit audio)
    """
    with open(path, "rb") as f:
        # Check RIFF header
        if f.read(4) != b"RIFF":
            raise ValueError("Not a RIFF file")
        _ = _read_u32_le(f)  # file size
        if f.read(4) != b"WAVE":
            raise ValueError("Not a WAVE file")

        # Find "fmt " chunk
        cid, fmt_size = _find_chunk(f, b"fmt ")
        if cid is None:
            raise ValueError("fmt chunk not found")

        audio_format   = _read_u16_le(f)   # 1 = PCM
        num_channels   = _read_u16_le(f)
        sample_rate    = _read_u32_le(f)
        _byte_rate     = _read_u32_le(f)
        _block_align   = _read_u16_le(f)
        bits_per_samp  = _read_u16_le(f)

        # Skip any extra fmt data
        remaining = fmt_size - 16
        if remaining > 0:
            f.read(remaining)

        if audio_format != 1:
            raise ValueError("WAV is not PCM (convert with ffmpeg)")
        if bits_per_samp != 16:
            raise ValueError("Only 16-bit PCM supported in this example")

        # Find "data" chunk
        cid, data_size = _find_chunk(f, b"data")
        if cid is None:
            raise ValueError("data chunk not found")

        # Configure I2S
        fmt = I2S.MONO if num_channels == 1 else I2S.STEREO

        audio_out = I2S(
            0,
            sck=Pin(PIN_BCLK),
            ws=Pin(PIN_LRCLK),
            sd=Pin(PIN_DATA),
            mode=I2S.TX,
            bits=16,
            format=fmt,
            rate=sample_rate,
            ibuf=40_000,  # bigger buffer = smoother audio
        )

        # Stream audio
        buf = bytearray(4096)
        mv = memoryview(buf)

        # Optional: simple volume scaling (costs CPU)
        do_scale = (volume_scale is not None) and (volume_scale >= 0.0) and (volume_scale < 0.999)

        bytes_left = data_size
        while bytes_left > 0:
            n = f.readinto(buf)
            if not n:
                break

            if n > bytes_left:
                n = bytes_left

            if do_scale:
                # Scale signed 16-bit little-endian samples in-place
                # (works for mono or stereo the same way)
                for i in range(0, n, 2):
                    s = buf[i] | (buf[i+1] << 8)
                    if s & 0x8000:
                        s -= 0x10000
                    s = int(s * volume_scale)
                    if s > 32767: s = 32767
                    if s < -32768: s = -32768
                    if s < 0:
                        s += 0x10000
                    buf[i] = s & 0xFF
                    buf[i+1] = (s >> 8) & 0xFF

            # write blocks until accepted
            written = 0
            while written < n:
                written += audio_out.write(mv[written:n])

            bytes_left -= n

        audio_out.deinit()

# =========================
# Play it
# =========================
play_wav("/sample.wav", volume_scale=0.7)
Next, click the run button and you should hear the sound that you have uploaded through the speaker.